Using Assemble
Overview
Use Assemble to join and participate in a live session from a training module.
This guide explains how to enter a session and use the meeting room features for audio, video, chat, shared notes, presentations, screen sharing, reactions, and whiteboard collaboration.
Permissions / Access
Access depends on registration in the training module, activity availability, and the controls enabled for the session.
- Users
- Department Managers
- Company Managers
Navigation Path
Training Module -> Assemble Activity -> Join Session
Steps
Join a session
- Navigate to the training module that contains the Assemble activity.
- Select the Assemble activity.
- Select Join Session.
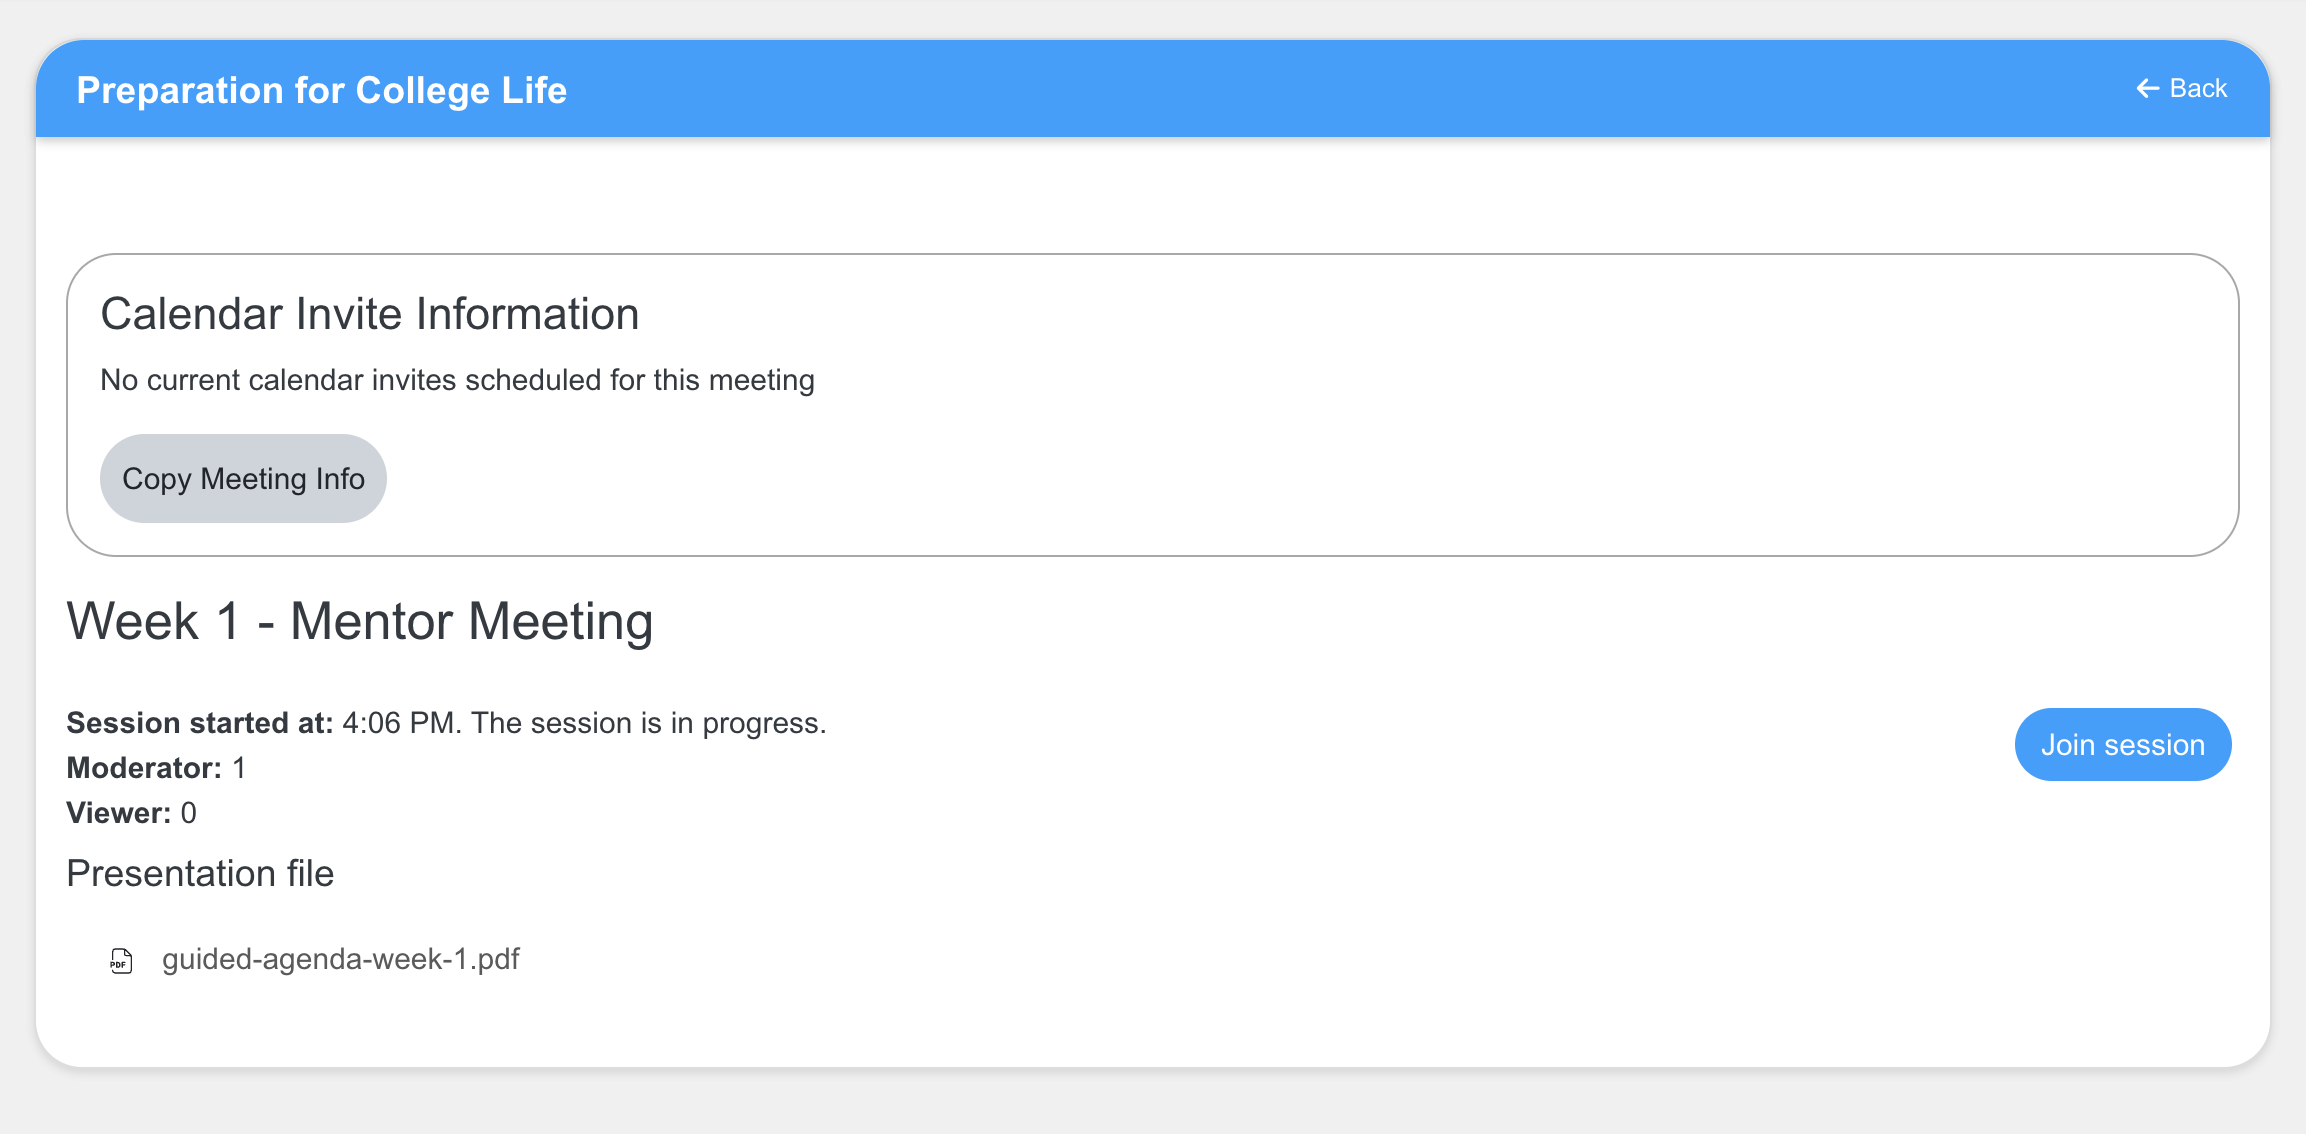
- Allow microphone or camera access if prompted by the browser.
- Select whether to join with a microphone or listen only.
- Follow the audio prompt to confirm that your microphone and speakers are working.
- Enter the live meeting room.
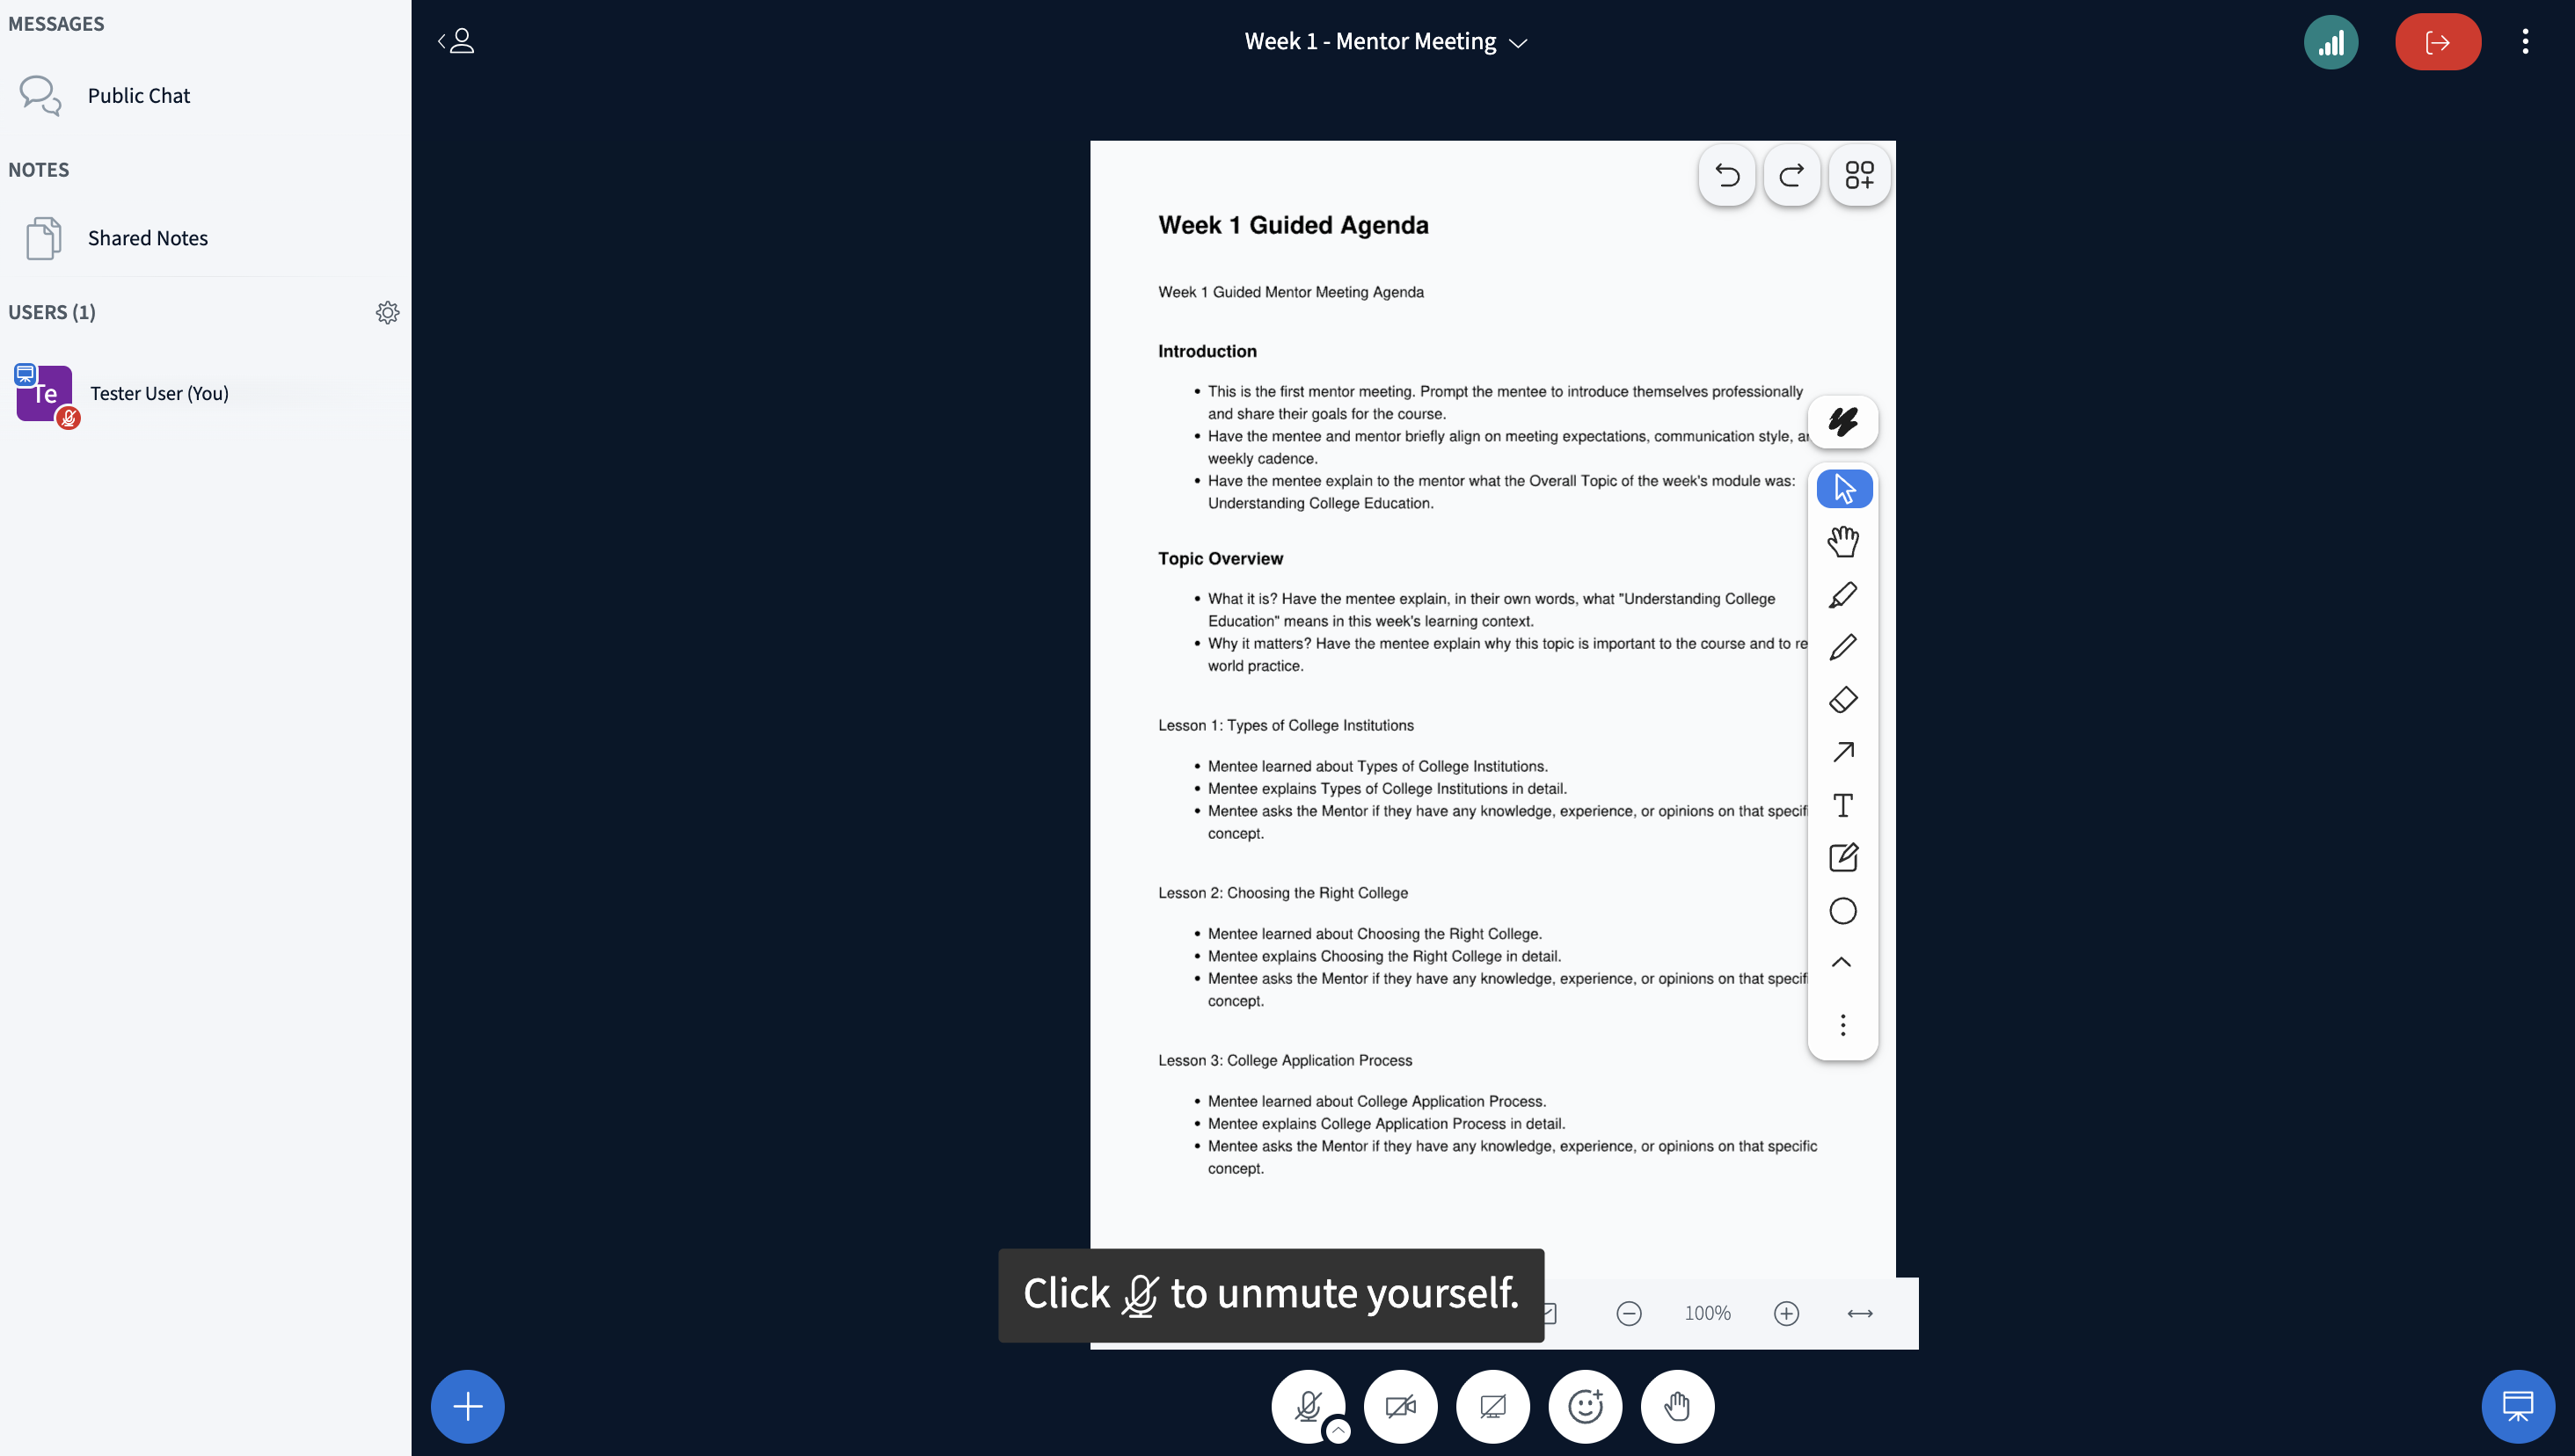
Use the meeting header
The meeting header provides session-level information and controls.
- Select the meeting title to review available meeting information.
- Review the connection indicator to check the current connection status.
- Select the leave button to exit the meeting room.
- Select the More options menu to review any additional actions available to your role.
Use chat, notes, and the user list
The left panel contains the communication and participant areas.
- Select Public Chat to read or send messages visible to the session.
- Select Shared Notes to add or review collaborative notes.
- Review Users to see the people currently in the session.
Presenter
The Presenter role is an important part of managing an Assemble session. You must be the Presenter to share your screen. The Presenter may also have access to presentation and whiteboard controls that are not available to other participants.
You are the current Presenter when a blue presentation icon appears above your profile picture in the Users list.
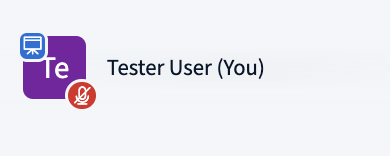
To take the Presenter role when you have permission:
- Select your profile picture or name in the Users list.
- Select the option to become the Presenter.
- Confirm that the blue Presenter icon appears above your profile picture.
- Select the screen sharing control when you are ready to share your screen.
Only one person can be the Presenter at a time. Taking the Presenter role transfers it from the current Presenter.
Meeting Settings
Meeting Settings are available from the gear beside the Users heading when you have permission to manage the session.
- Select the gear beside Users.
- Select the setting or meeting management action you need.
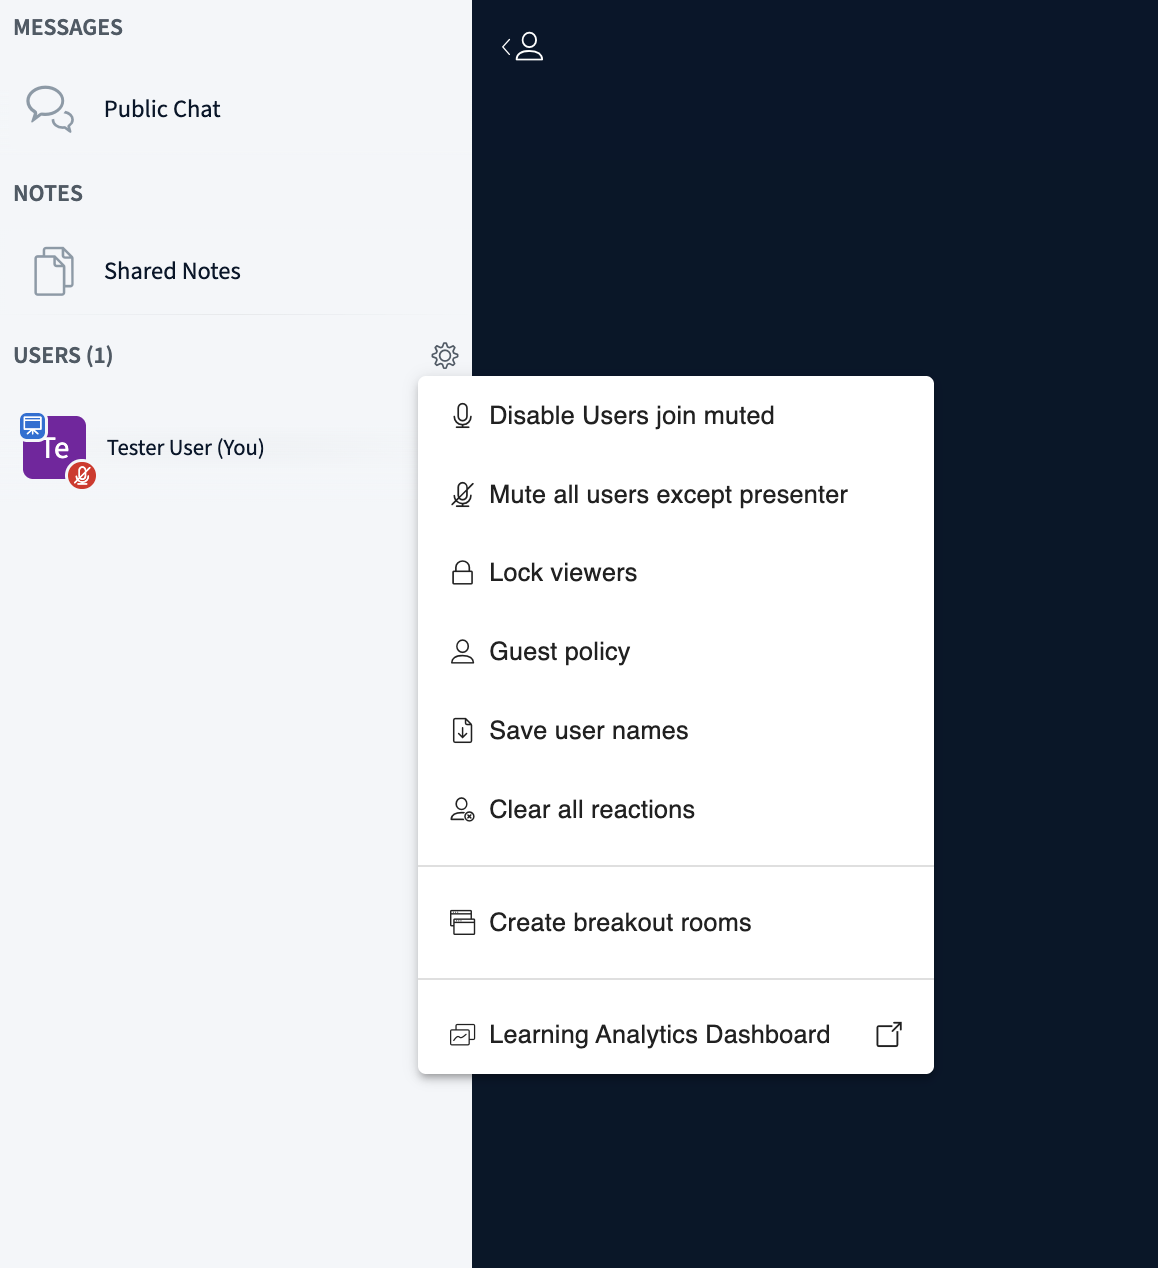
Available options may include:
- Users join muted controls whether users enter the session with their microphones muted.
- Mute all users except presenter mutes the other participants while leaving the Presenter unmuted.
- Lock viewers opens participant restrictions for features such as microphones, cameras, chat, shared notes, and the user list.
- Guest policy controls how guests enter the session.
- Save user names saves the names of the people in the session.
- Clear all reactions removes the current participant reactions and statuses.
- Create breakout rooms opens the setup for dividing participants into smaller meeting rooms.
- Learning Analytics Dashboard opens session participation information in a separate page.
The wording of an option may change to reflect its current state. For example, the menu may display Disable Users join muted when that setting is already enabled.
Use audio, video, screen sharing, and reactions
The meeting controls appear along the bottom of the meeting room.
- Select the audio control to mute or unmute your microphone.
- Select the camera control to start or stop your camera.
- Select the screen sharing control to share or stop sharing your screen when this option is available.
- Select the reactions control to choose a status or reaction.
- Select the raise hand control to request attention from the facilitator.
Your role and the session settings determine which controls you can use.
Navigate a presentation
The presentation appears in the center of the meeting room.
- Select the previous or next control to move between slides when presentation navigation is available.
- Select the slide name or number to move directly to another slide.
- Select the zoom controls to decrease or increase the presentation size.
- Select the fit control to adjust the presentation to the available space.
- Select the presentation control in the lower-right corner to hide or restore the presentation area.
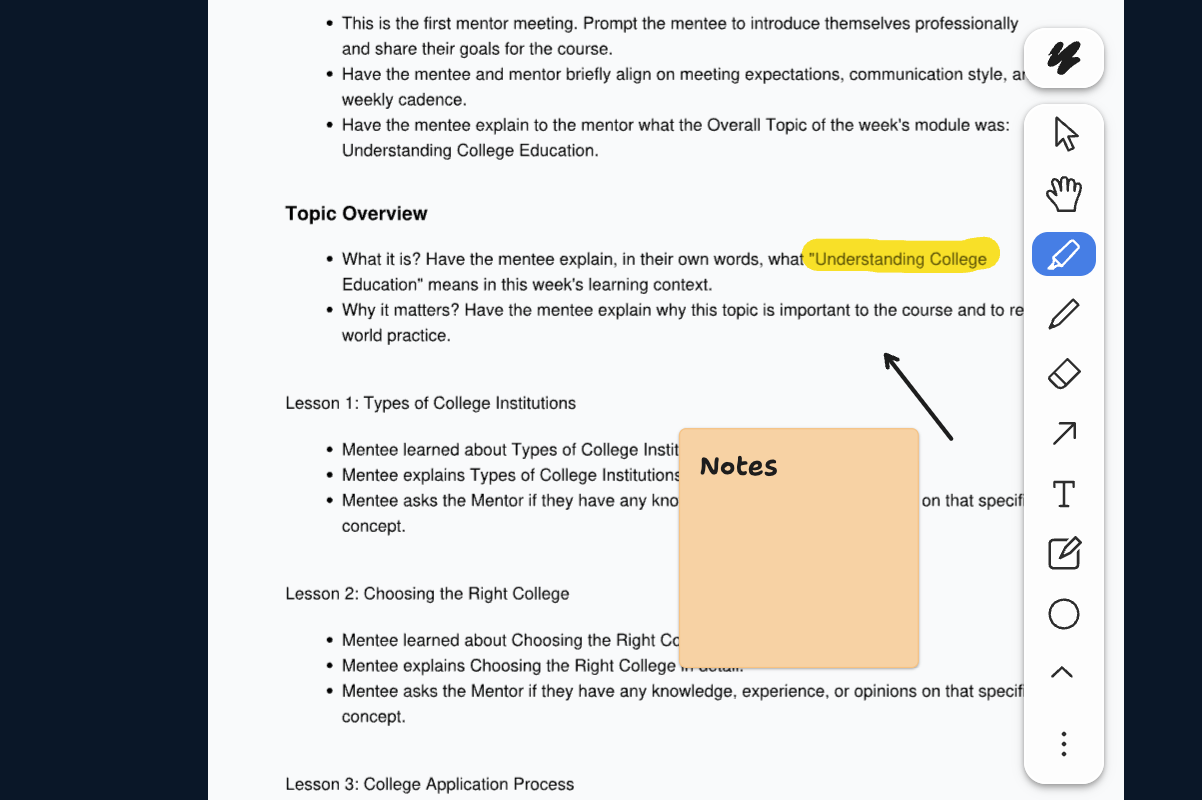
Use whiteboard and annotation tools
Presentation controls may include whiteboard and annotation tools for people with presentation permissions.
- Select the pointer or pan tool to point to content or move around the presentation.
- Select a drawing tool to add freehand marks.
- Select the eraser to remove annotations.
- Select the arrow, text, note, rectangle, or circle tool to add the selected annotation type.
- Select Undo or Redo to reverse or restore a recent annotation.
- Select the multi-user whiteboard control to allow additional users to annotate when this option is available.
- Select the additional whiteboard menu to review more annotation options.
Use session actions
People with additional session permissions may see an Actions button in the lower-left corner of the meeting room.
- Select the Actions button.
- Select the action needed for the session.
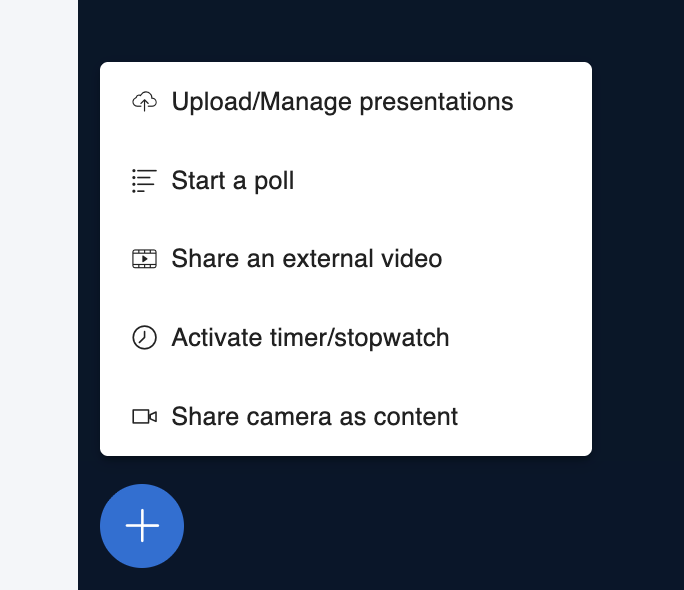
Available actions may include:
- Upload/Manage presentations
- Start a poll
- Share an external video
- Activate timer/stopwatch
- Share camera as content
The available options depend on the session settings and your role.
Leave the session
- Select the leave button in the meeting header.
- Confirm the action if prompted.
People with session management permission may also have an option to end the session for everyone. Use that option only when the meeting is complete.
Result
- You can join the Assemble session and participate with the features available to your role.
- You can leave the session without ending it for other participants.
- People with additional session permissions can manage the presentation and collaborative controls available for the session.
Notes / Tips
- Join early if you need time to test your microphone or camera.
- Use listen only when you do not need to speak.
- Keep the meeting room open in your browser while participating.
- Use Shared Notes for collaborative notes that other participants need to review.
- Confirm which presentation or whiteboard controls are available before leading a session.
- Confirm that the blue Presenter icon appears above your profile picture before sharing your screen.
- Plan breakout room assignments and timing before creating the rooms.
- Select leave instead of end session when other participants should remain in the room.
Troubleshooting
Common issue: The session has not started.
Solution: Wait for the scheduled time or for a moderator to start the session.
Common issue: The browser blocks the microphone or camera.
Solution: Allow microphone or camera access in the browser prompt or browser site settings, then rejoin the session if needed.
Common issue: A meeting control is not visible.
Solution: Confirm that the control is enabled for the session and available to your role.
Common issue: The screen sharing control is unavailable.
Solution: Confirm that you have permission to be the Presenter, select your profile in the Users list, and take the Presenter role before sharing your screen.
Common issue: The Meeting Settings gear is unavailable.
Solution: Confirm that you have permission to manage the session. Meeting Settings are not available to every participant.
Common issue: Audio or video quality is poor.
Solution: Review the connection indicator, close unnecessary browser tabs, and confirm that the correct microphone, speakers, and camera are selected.